Adding custom providers
Any custom provider can be added to AI Tools. To do this, follow the instructions below.
Prerequisites
-
Base URL. The web address where API requests are sent. It usually includes the API version:
https://ai-provider-base-url/v1 -
API key. A unique key provided by the service provider, used for authentication.
Requests to a custom provider are cross-origin, so the provider's endpoint must allow the AI Tools origin — onlyoffice://plugin in the desktop app, or your Document Server address when the editors run in a browser — and must answer CORS preflight OPTIONS requests with a 2xx status. Public cloud APIs usually do this out of the box; for local servers and endpoints behind a proxy, see CORS requirements below.
Step 1. Create the provider file
If the provider is compatible with the OpenAI API, you do not need a provider file. When adding a model, select the built-in OpenAI Compatible provider and enter the base URL and API key. Create a provider file when you want a provider with its own name, a preset base URL, or a fixed list of models, or when the provider uses a different API.
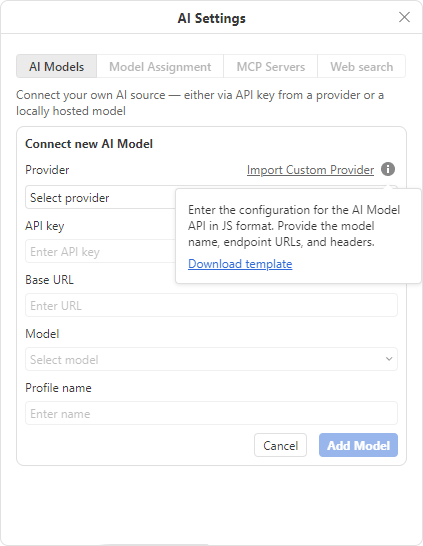
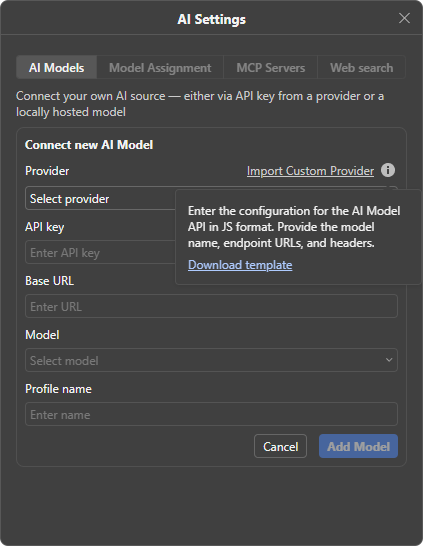
A custom provider is a JavaScript file that declares a class named Provider. The easiest way to start is the template: when adding a model, click the information icon next to Import Custom Provider and then click Download template in the tooltip. The template is a complete provider for an OpenAI-compatible API, and the comment at its beginning describes all methods and their arguments.
AI Tools runs the file in a sandbox. You do not need import statements, and the file does not have to return anything. The following objects are already available in the file:
| Name | Description |
|---|---|
AbstractBaseProvider | The base class for the Provider class. It stores the credentials passed to the constructor in this.creds. |
ProviderErrors | Factories for the errors returned by checkProvider(): invalidKey(), emptyKey(), invalidUrl(), connectionFailed(). |
mapFetchError | Converts an error thrown by fetch into the error format that AI Tools displays. |
Provider class
The Provider class must extend AbstractBaseProvider and define the following methods:
| Method | Required | Description |
|---|---|---|
sendMessage(args) | Yes | Sends a chat request and streams the response. This is an async generator: it yields snapshots of the assistant message ({ role, content }) as the response arrives, and finally yields { isEnd: true, responseMessage }. |
sendMessageSync(args) | Yes | Sends a chat request without streaming. Returns a promise that resolves to the response text. |
imageGeneration(args) | No | Generates an image. Returns a promise that resolves to a data URL or a remote URL of the image. |
static getName() | Yes | Returns the provider name displayed in the Provider list. |
static getBaseUrl() | Yes | Returns the default base URL filled in when the user adds a model. |
static checkProvider({ baseUrl, apiKey }) | Yes | Checks the credentials. Returns true, or one of the ProviderErrors errors. |
static getProviderModels({ baseUrl, apiKey }) | Yes | Returns the list of models: { id, name, provider, capabilities } objects. |
static isDesktopOnly() | No | Returns true if the provider works only in Desktop Editors, for example, when it connects to a server on localhost. The web editors skip such a provider without showing an error. |
The methods receive the following arguments:
| Argument | Properties |
|---|---|
sendMessage | { messages, model, systemPrompt, tools, withReasoning, signal } (tools, withReasoning, and signal are optional) |
sendMessageSync | { messages, model, systemPrompt, signal } (signal is optional) |
imageGeneration | { model, prompt, width, height, signal } (width, height, and signal are optional) |
Follow these rules in the instance methods:
- Send requests through the transport that AI Tools passes in
this.creds.fetch, falling back to the globalfetch(seefetchFor()in the example below). This lets AI Tools route the request through a proxy when needed. - Pass
args.signalto every request, and checksignal.abortedwhen reading a stream. Otherwise, the Stop button in AI Chat cannot cancel the request.
Model capabilities
The capabilities property of each model returned by getProviderModels() defines what AI Tools can use the model for. Combine the values with |, for example, 0x01 | 0x80 | 0x100 for a chat model that supports images and tools.
| Value | Capability |
|---|---|
0x01 | Chat |
0x02 | Image generation |
0x04 | Embeddings |
0x08 | Audio (speech and transcription) |
0x80 | Vision (image input) |
0x100 | Tools (function calling) |
Example
This provider connects to Alibaba Cloud with a fixed name, base URL, and list of models. It is based on the template: sendMessage(), sendMessageSync(), and the helper functions are the same, while checkProvider() and getProviderModels() do not call the endpoint. As a result, an invalid API key is reported on the first request instead of when the model is added.
const PROVIDER_NAME = "Alibaba Cloud";
const PROVIDER_BASE_URL = "https://dashscope.aliyuncs.com/compatible-mode/v1";

const CAP_CHAT = 0x01;
const CAP_VISION = 0x80;
const CAP_TOOLS = 0x100;

const MODELS = [
  { id: "qwen-max", capabilities: CAP_CHAT | CAP_TOOLS },
  { id: "qwen-plus", capabilities: CAP_CHAT | CAP_TOOLS },
  { id: "qwen-turbo", capabilities: CAP_CHAT | CAP_TOOLS },
  { id: "qwen-vl-max", capabilities: CAP_CHAT | CAP_VISION },
];

// Host transport when set, e.g. a proxy that inserts the real API key or bypasses CORS.
const fetchFor = (creds) => creds?.fetch ?? fetch;

class Provider extends AbstractBaseProvider {
  async *sendMessage({ messages, model, systemPrompt, tools, signal }) {
    const body = {
      model,
      stream: true,
      messages: [
        { role: "system", content: systemPrompt },
        ...messages.map(toOpenAIMessage),
      ],
    };
    if (tools && tools.length) {
      body.tools = tools.map(toOpenAITool);
    }

    let res;
    try {
      res = await fetchFor(this.creds)(`${this.creds.baseUrl}/chat/completions`, {
        method: "POST",
        headers: this.headers(),
        body: JSON.stringify(body),
        signal,
      });
    } catch (err) {
      throw mapFetchError(err, !!this.creds.apiKey);
    }
    if (!res.ok) {
      throw mapFetchError(
        new Error(await res.text().catch(() => res.statusText)),
        !!this.creds.apiKey
      );
    }

    const reader = res.body.getReader();
    const decoder = new TextDecoder();
    let buffer = "";
    const acc = {
      role: "assistant",
      content: [{ type: "text", text: "" }],
    };
    const toolCallsByIndex = new Map();

    while (true) {
      if (signal?.aborted) break;
      const { value, done } = await reader.read();
      if (done) break;
      buffer += decoder.decode(value, { stream: true });

      let nl;
      while ((nl = buffer.indexOf("\n")) >= 0) {
        const line = buffer.slice(0, nl).trim();
        buffer = buffer.slice(nl + 1);
        if (!line.startsWith("data:")) continue;
        const payload = line.slice(5).trim();
        if (payload === "[DONE]") continue;

        let chunk;
        try {
          chunk = JSON.parse(payload);
        } catch {
          continue;
        }
        const delta = chunk.choices?.[0]?.delta;
        if (!delta) continue;

        if (typeof delta.content === "string" && delta.content.length) {
          acc.content[0].text += delta.content;
          yield cloneSnapshot(acc, toolCallsByIndex);
        }
        if (Array.isArray(delta.tool_calls)) {
          for (const tc of delta.tool_calls) {
            const idx = tc.index ?? 0;
            const slot = toolCallsByIndex.get(idx) ?? {
              id: "",
              name: "",
              args: "",
            };
            if (tc.id) slot.id = tc.id;
            if (tc.function?.name) slot.name += tc.function.name;
            if (tc.function?.arguments) slot.args += tc.function.arguments;
            toolCallsByIndex.set(idx, slot);
          }
          yield cloneSnapshot(acc, toolCallsByIndex);
        }
      }
    }

    yield {
      isEnd: true,
      responseMessage: cloneSnapshot(acc, toolCallsByIndex),
    };
  }

  async sendMessageSync({ messages, model, systemPrompt, signal }) {
    let res;
    try {
      res = await fetchFor(this.creds)(`${this.creds.baseUrl}/chat/completions`, {
        method: "POST",
        headers: this.headers(),
        body: JSON.stringify({
          model,
          messages: [
            { role: "system", content: systemPrompt },
            ...messages.map(toOpenAIMessage),
          ],
        }),
        signal,
      });
    } catch (err) {
      throw mapFetchError(err, !!this.creds.apiKey);
    }
    if (!res.ok) {
      throw mapFetchError(
        new Error(await res.text().catch(() => res.statusText)),
        !!this.creds.apiKey
      );
    }
    const json = await res.json();
    return json.choices?.[0]?.message?.content ?? "";
  }

  headers() {
    const h = { "Content-Type": "application/json" };
    if (this.creds.apiKey) h.Authorization = `Bearer ${this.creds.apiKey}`;
    return h;
  }

  static getName() {
    return PROVIDER_NAME;
  }
  static getBaseUrl() {
    return PROVIDER_BASE_URL;
  }

  static async checkProvider({ baseUrl, apiKey }) {
    if (!baseUrl) return ProviderErrors.invalidUrl();
    if (!apiKey) return ProviderErrors.emptyKey();
    return true;
  }

  static async getProviderModels() {
    return MODELS.map((m) => ({
      id: m.id,
      name: m.id,
      provider: PROVIDER_NAME,
      capabilities: m.capabilities,
    }));
  }
}

// Convert a chat message to an OpenAI chat message.
function toOpenAIMessage(msg) {
  const role = msg.role === "assistant" ? "assistant" : "user";
  const content = [];
  let text = "";
  if (typeof msg.content === "string") {
    text = msg.content;
  } else if (Array.isArray(msg.content)) {
    for (const part of msg.content) {
      if (part?.type === "text" && typeof part.text === "string") {
        text += part.text;
      } else if (part?.type === "image" && (part.image || part.url)) {
        content.push({
          type: "image_url",
          image_url: { url: part.image || part.url },
        });
      }
    }
  }
  if (text) content.unshift({ type: "text", text });
  return {
    role,
    content:
      content.length === 1 && content[0].type === "text" ? text : content,
  };
}

// Convert a tool descriptor to the OpenAI tool schema.
function toOpenAITool(item) {
  return {
    type: "function",
    function: {
      name: item.name,
      description: item.description ?? "",
      parameters: item.inputSchema ?? { type: "object", properties: {} },
    },
  };
}

// Snapshot the accumulated assistant message (text + tool calls).
function cloneSnapshot(acc, toolCallsByIndex) {
  const content = acc.content.map((p) => ({ ...p }));
  if (toolCallsByIndex.size > 0) {
    const calls = [...toolCallsByIndex.values()].map((c) => ({
      id: c.id,
      name: c.name,
      args: c.args,
    }));
    content.push({ type: "tool-call", calls });
  }
  return { role: acc.role, content };
}
Save the file with the .js extension. Administrators can import the same file in the Admin Panel to make the provider available to all users. See Configuring AI providers for all users.
Step 2. Configure the provider in AI Tools
To add the custom provider:
-
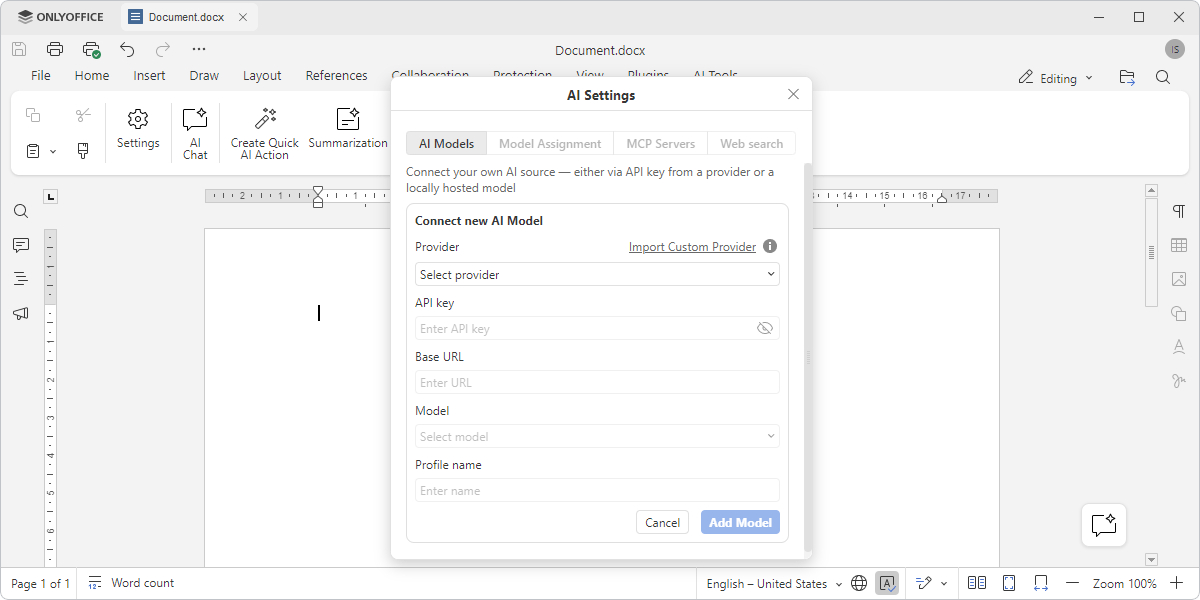
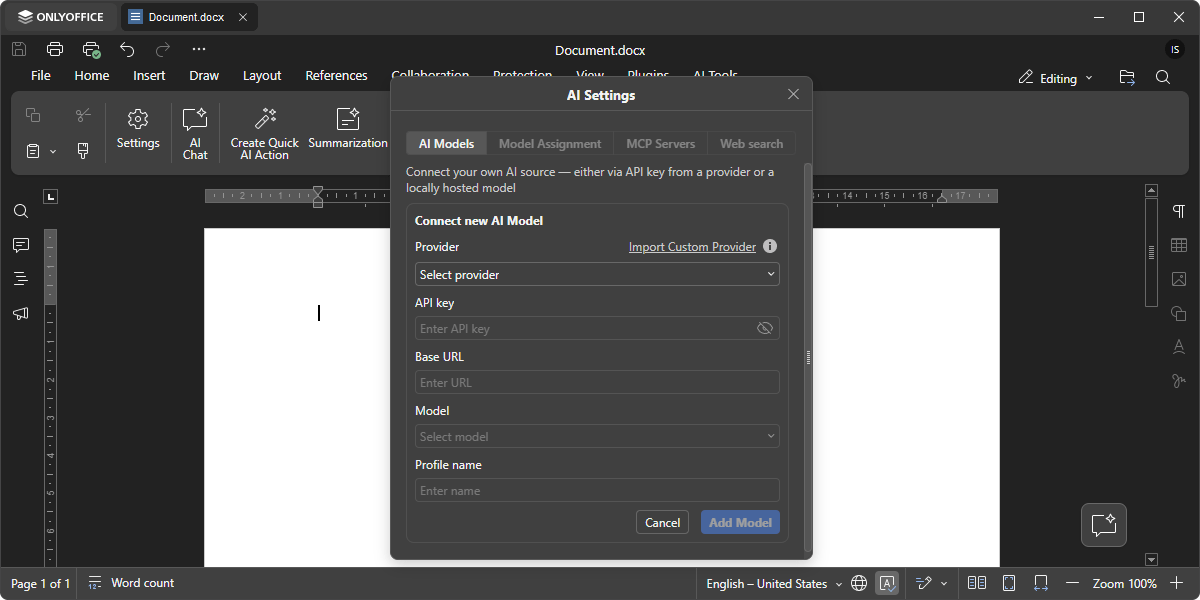
Open the AI Tools tab and click Settings. The AI Settings dialog opens.
-
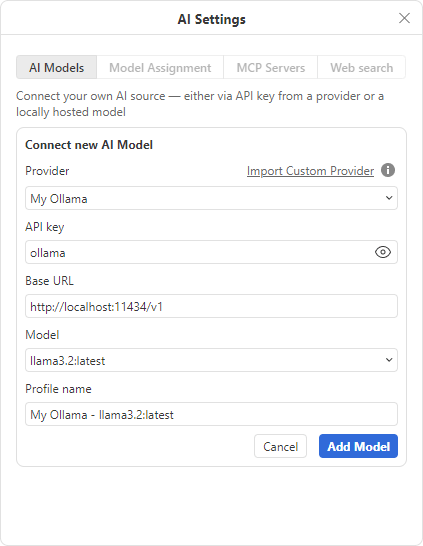
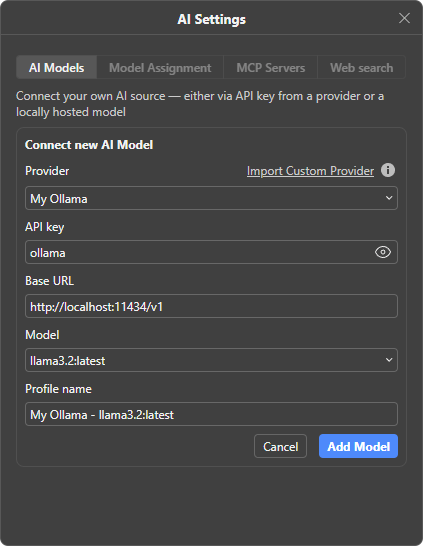
Click Add Model and in the Connect new AI Model form, click Import Custom Provider, then select the provider configuration JavaScript file in the system file picker.
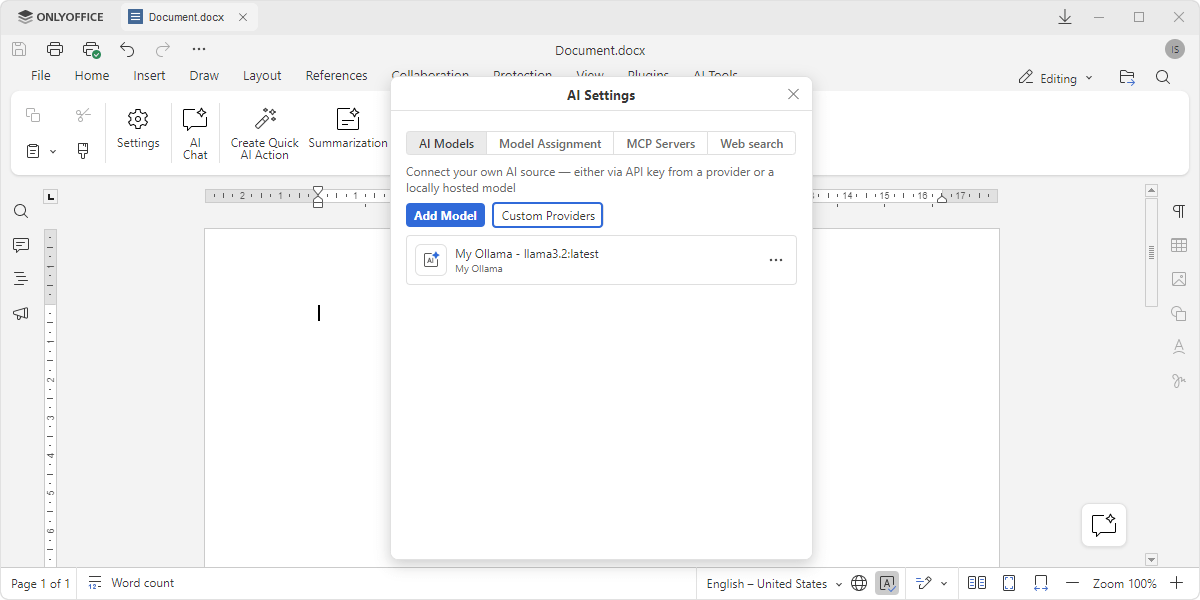
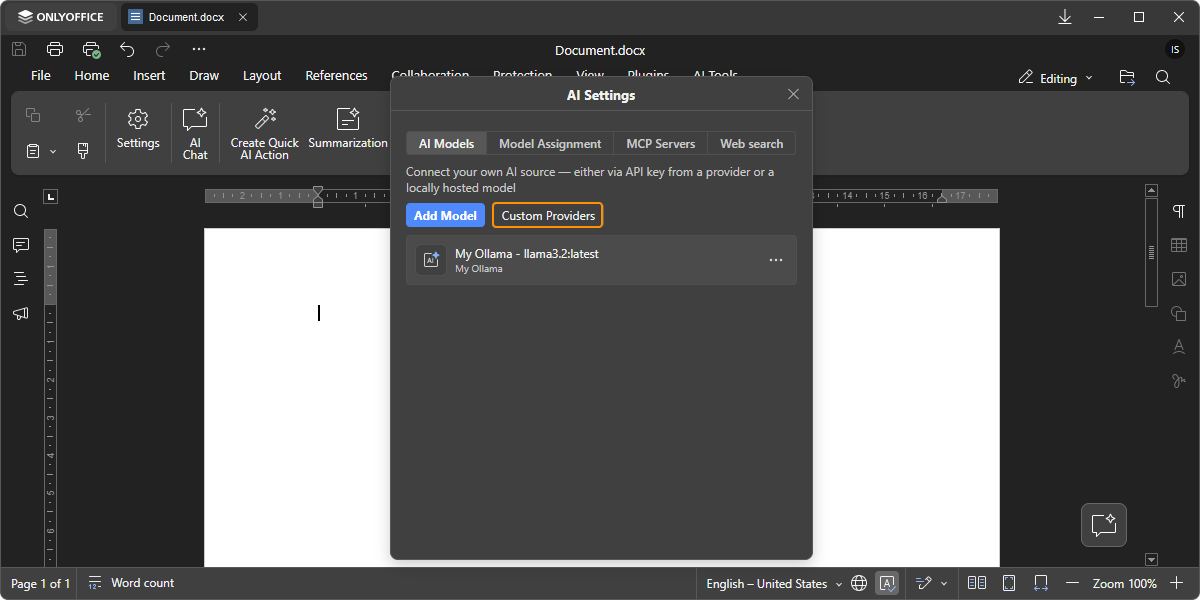
noteThe information icon next to Import Custom Provider opens a tooltip with the Download template link. The template is described in Step 1. The screenshots below use Ollama.
-
After import, the provider appears in the Provider list. The form fills Provider and Base URL from the imported file, then loads Model from the endpoint and fills Profile name. Enter the API key, then click Add Model. The model appears in the list on the AI Models tab.
noteAPI key stays empty after import. Enter the key from your provider. For a local server such as Ollama, any value is enough: the server does not validate it, but Add Model stays disabled until the field is filled. If the Model list stays empty, the endpoint is blocking the request. See CORS requirements or Configuring Ollama with CORS.
-
On the Model Assignment tab, assign the custom provider's model as the Default model or to a specific task.
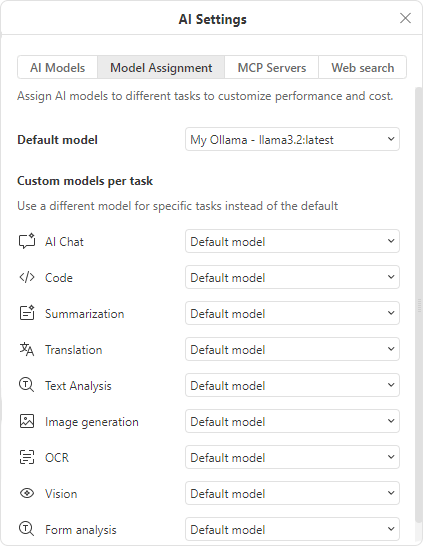
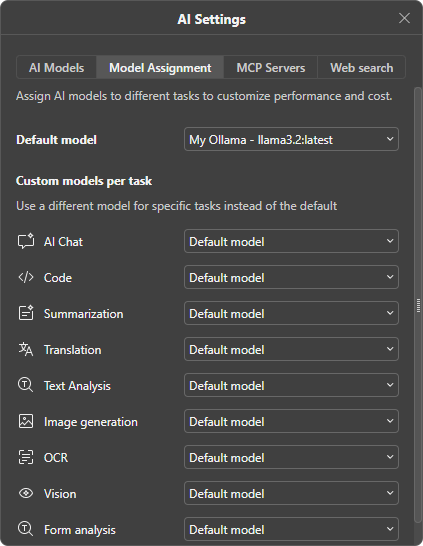
AI Tools is ready to use the custom provider.
Managing custom providers
To edit or delete a connected model, open its ... menu on the AI Models tab and choose Edit or Delete.


To add or remove provider files:
-
On the AI Models tab, click Custom Providers.
-
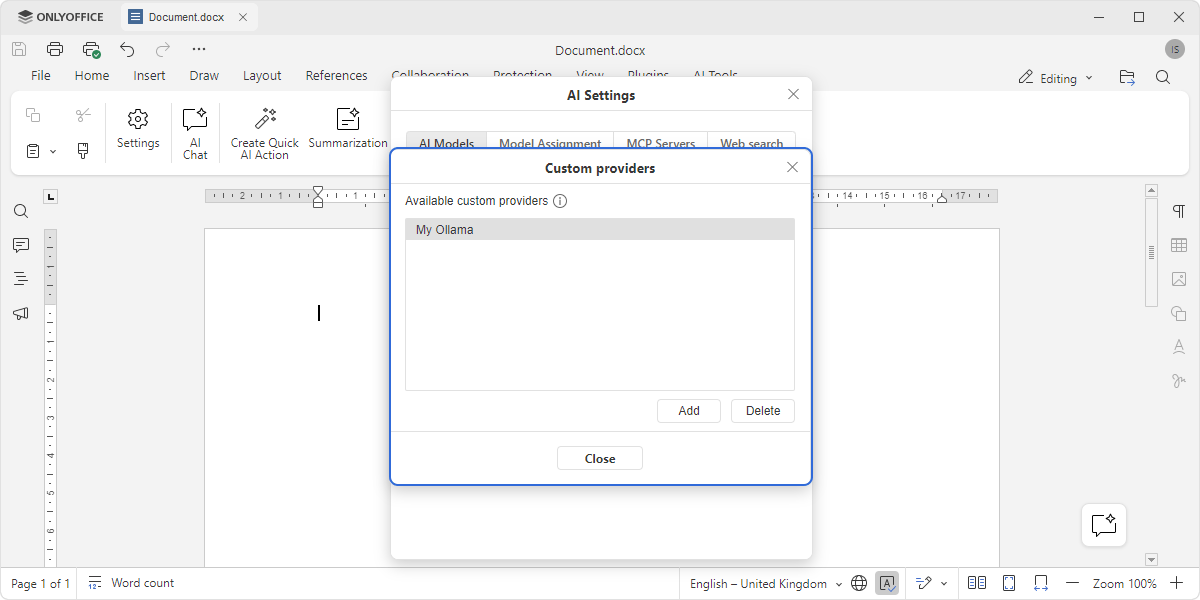
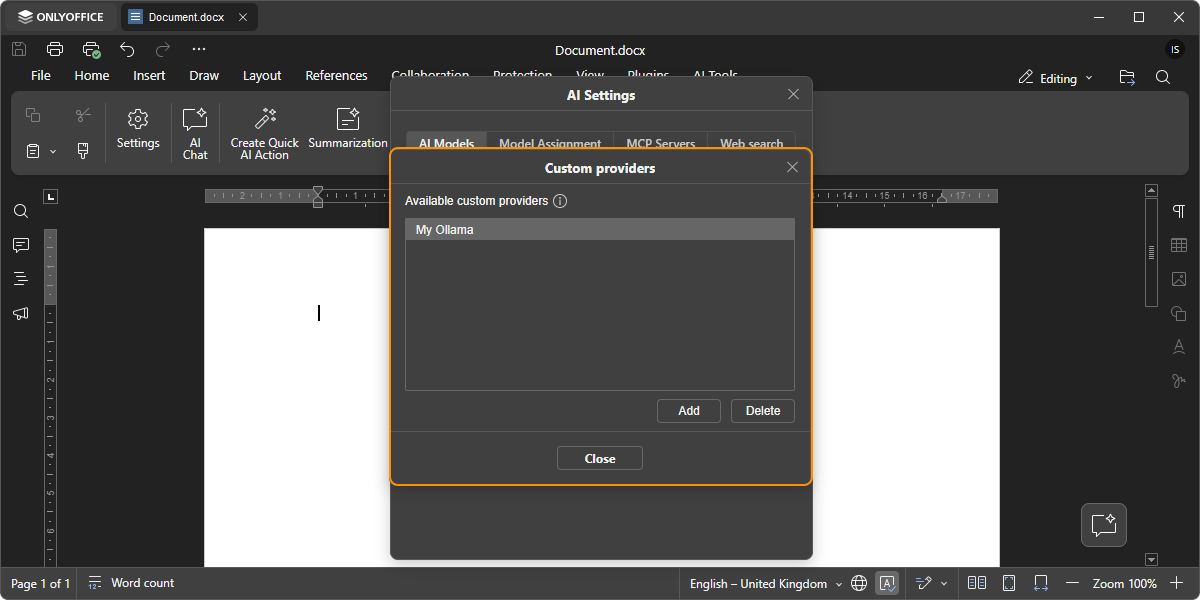
In the Custom providers dialog, click Add to upload another provider file, or select a provider and click Delete to remove it. Then click Close.
CORS requirements
AI Tools runs in a web context, so every request to a custom provider is a cross-origin request, and the provider's endpoint decides whether the browser may read the response. If it does not allow AI Tools, the provider cannot be used: the model list stays empty and the browser console reports Access to fetch at '.../v1/models' from origin 'onlyoffice://plugin' has been blocked by CORS policy: .... The text after the colon names the specific cause — most often a missing Access-Control-Allow-Origin header. Whether you have to configure anything depends on the type of endpoint.
What the endpoint must return
The endpoint must answer the preflight on every API path AI Tools calls — not only /v1/models — with:
Access-Control-Allow-Origin: onlyoffice://plugin
Access-Control-Allow-Headers: Authorization, Content-Type
Access-Control-Allow-Methods: GET, POST, OPTIONS
The actual response needs Access-Control-Allow-Origin too. Access-Control-Allow-Headers and Access-Control-Allow-Methods are read from the preflight response only.
In the desktop app AI Tools runs on the onlyoffice:// scheme, which ONLYOFFICE registers as a standard, secure, CORS-enabled scheme, so requests from AI Tools carry an Origin header and follow the same CORS rules as any web page. AI Tools is served from onlyoffice://plugin/, which makes onlyoffice://plugin the origin to allow. When the editors run in a browser, the origin is your Document Server address instead — use it in place of onlyoffice://plugin in all the examples below. Access-Control-Allow-Origin holds a single value, so to allow both cases either return *, or echo the origin of the incoming request. When you echo the origin, add Vary: Origin so that a cache does not serve one origin's response to another. Reflecting any origin makes the endpoint callable from any website, so on a publicly reachable endpoint match the incoming origin against an allowlist instead — see the security note under Basic Nginx configuration in the Ollama guide.
AI Tools always sends Content-Type: application/json, and adds Authorization: Bearer <key> when the provider has an API key. application/json is not a CORS-safelisted value, so the browser sends a preflight OPTIONS request before the actual one. The endpoint must answer it with 200 or 204, and never with a redirect.
A provider file does not decide whether its requests go through a proxy. Its instance methods send requests through the transport that AI Tools passes in this.creds.fetch (see fetchFor() in the example), so AI Tools can route them through a proxy when needed. The static checkProvider() and getProviderModels() methods receive only the base URL and the API key and call the endpoint directly, so when they load the model list from the endpoint, the endpoint always has to return the headers above.
Public cloud APIs
OpenAI, OpenRouter, Mistral and similar services send CORS headers by default, so there is nothing to configure. Some APIs require an extra opt-in request header before they answer browser requests, so if the model list does not load, check the provider's own documentation.
Local AI servers
Ollama, LM Studio and Open WebUI only accept origins that are listed explicitly, so add the AI Tools origin to that list: OLLAMA_ORIGINS=http://*,https://*,onlyoffice://* in Ollama, CORS_ALLOW_ORIGIN in Open WebUI, or the CORS switch in the LM Studio server settings. OLLAMA_ORIGINS supports * wildcards, which is why onlyoffice://* covers the AI Tools origin there, while a strict allowlist — an nginx map, a Traefik accessControlAllowOriginList — needs the exact value onlyoffice://plugin. llama.cpp and vLLM allow every origin by default and need no configuration; in vLLM the list can be narrowed with --allowed-origins. For a full Ollama walkthrough — setting the variable on each OS, restarting the service, verifying the response headers, and exposing it through a TLS-terminated nginx proxy — see Configuring Ollama with CORS.
Reverse proxy configuration
For an endpoint published through your own reverse proxy — nginx, Traefik, Caddy, or an API gateway — configuring the application is not always enough: the proxy has to let the preflight through, and the headers have to survive it. Configure CORS either in the application or in the proxy, but never in both — the browser rejects duplicated Access-Control-Allow-Origin headers.
nginx
Handle the preflight in the proxy itself:
location /v1/ {
    if ($request_method = OPTIONS) {
        add_header Access-Control-Allow-Origin "onlyoffice://plugin" always;
        add_header Access-Control-Allow-Methods "GET, POST, OPTIONS" always;
        add_header Access-Control-Allow-Headers "Authorization, Content-Type" always;
        add_header Access-Control-Max-Age "86400" always;
        return 204;
    }
    add_header Access-Control-Allow-Origin "onlyoffice://plugin" always;
    proxy_pass http://your-backend;
}
Traefik
Middleware and router labels:
traefik.http.middlewares.ai-cors.headers.accessControlAllowOriginList=onlyoffice://plugin
traefik.http.middlewares.ai-cors.headers.accessControlAllowMethods=GET,POST,OPTIONS
traefik.http.middlewares.ai-cors.headers.accessControlAllowHeaders=Authorization,Content-Type
traefik.http.middlewares.ai-cors.headers.accessControlMaxAge=86400
traefik.http.middlewares.ai-cors.headers.addVaryHeader=true
traefik.http.routers.<router-name>.middlewares=ai-cors@docker
The first labels only declare the middleware. The last one attaches it to the router — without it Traefik never applies the middleware and adds no CORS headers at all. The @docker suffix names the Traefik provider that the middleware is declared in — use @file if you declare it in a file provider instead of Docker labels.
If HTTP-to-HTTPS redirection is configured on the entry point, or a redirect middleware is evaluated before this one, Traefik answers the preflight with a 308 and no CORS headers at all — use the HTTPS address as the base URL.
Verifying the endpoint
Verify the endpoint before adding it as a provider.
Check the preflight:
curl -i -X OPTIONS 'https://<base-url>/models' \
  -H 'Origin: onlyoffice://plugin' \
  -H 'Access-Control-Request-Method: GET' \
  -H 'Access-Control-Request-Headers: authorization,content-type'
Then check the request itself:
curl -i 'https://<base-url>/models' \
  -H 'Origin: onlyoffice://plugin' \
  -H 'Authorization: Bearer <your-api-key>'
The first response must be 200 or 204 and must contain Access-Control-Allow-Origin, Access-Control-Allow-Methods, and Access-Control-Allow-Headers listing authorization and content-type. The second must be 200 and contain Access-Control-Allow-Origin. If both responses check out and the model list still fails to load, read the origin named in the console error: it may differ from the one you allowed.