Mobile integration on iOS devices
The document editor can be embedded in an iOS application using the WKWebView component. A complete demo project is available on GitHub.
Integration based on the ONLYOFFICE test sample
This example shows how to integrate ONLYOFFICE mobile web editors with the ONLYOFFICE test or DMS sample.
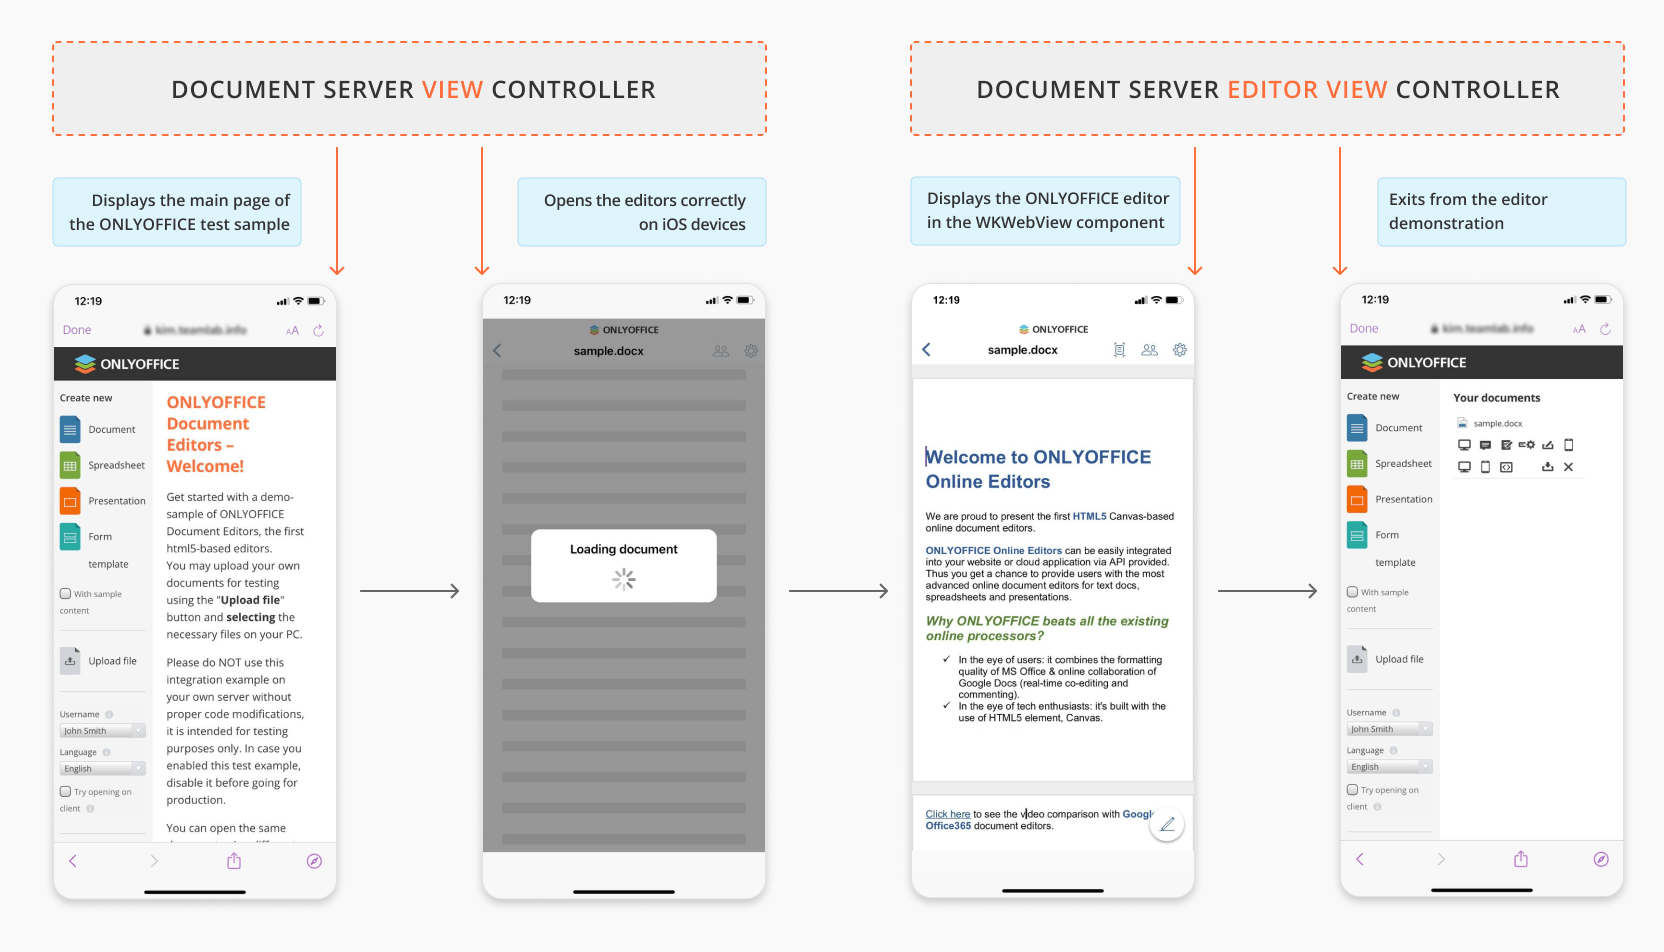
Opening ONLYOFFICE editors
-
Download and install ONLYOFFICE Docs Enterprise or Developer.
-
Download the mobile demo sample for iOS from GitHub.
-
Open the
EditorWebViewDemo.xcodeprojproject with Xcode to modify code fragments of this example for your DMS to work correctly. -
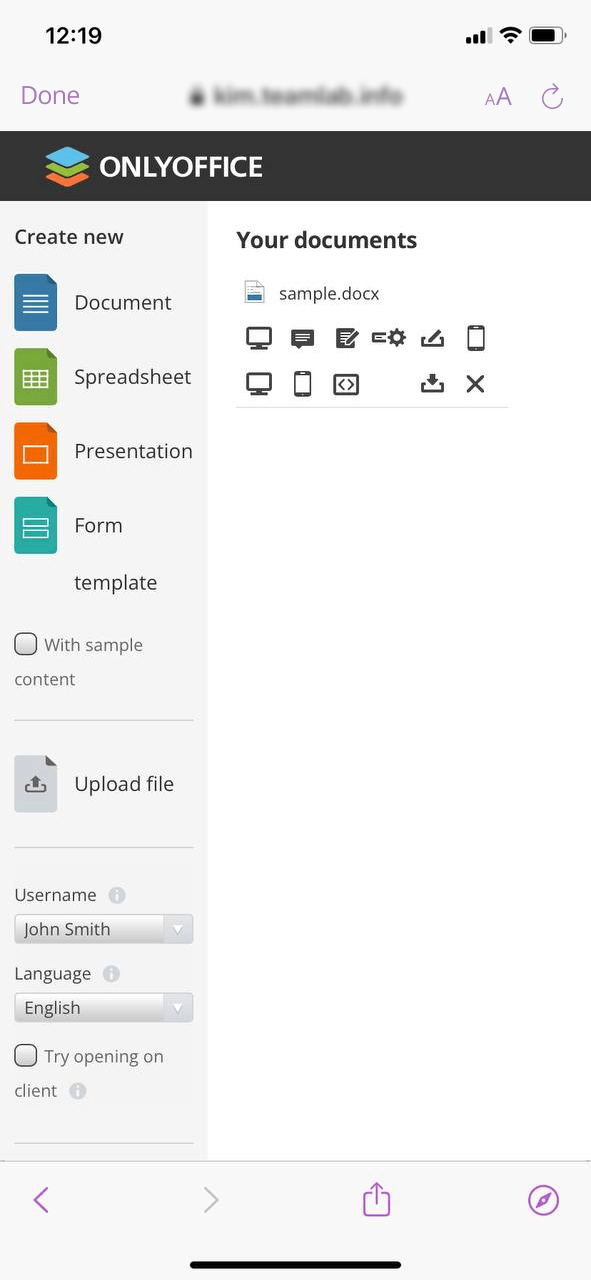
To display the main page of your DMS, specify the address of the ONLYOFFICE Docs example page in the
DOCUMENT_SERVER_EXAMPLE_URLproperty in theEditorWebViewDemo.xcconfigconfiguration file:DOCUMENT_SERVER_EXAMPLE_URL = documentserverWhere
documentserveris the name of the server where ONLYOFFICE Docs is installed.tipDon't have a document server yet? Register for a free ONLYOFFICE Docs Cloud and use the public IP address or public DNS name of your instance as
documentserver. You can find them in the Instances section of the cloud console.If
DOCUMENT_SERVER_EXAMPLE_URLis specified, the DMS main page is loaded. Otherwise, an error occurs:private func load() {if Env.documentServerExampleUrl.replacingOccurrences(of: "https://", with: "").isEmpty {showAlert(title: "Error", message: "You must specify the document server example page address for \"DOCUMENT_SERVER_EXAMPLE_URL\" value in configuration file.")return}guard let url = URL(string: Env.documentServerExampleUrl.addingPercentEncoding(withAllowedCharacters: .urlQueryAllowed) ?? "") else {return}webView.load(URLRequest(url: url))}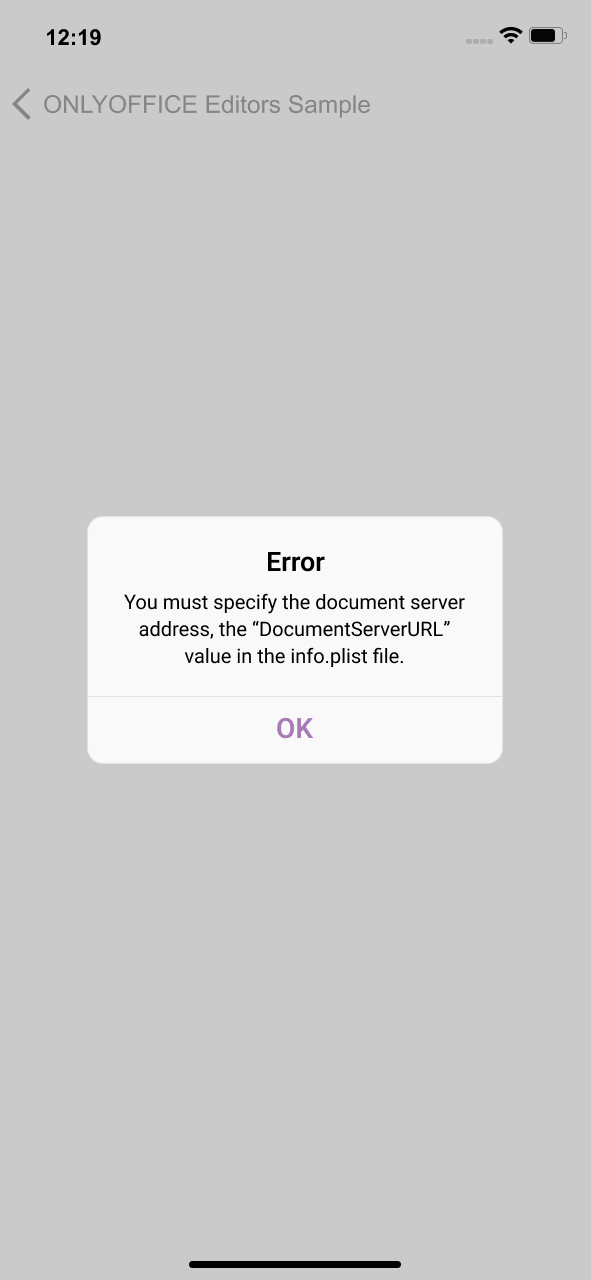
-
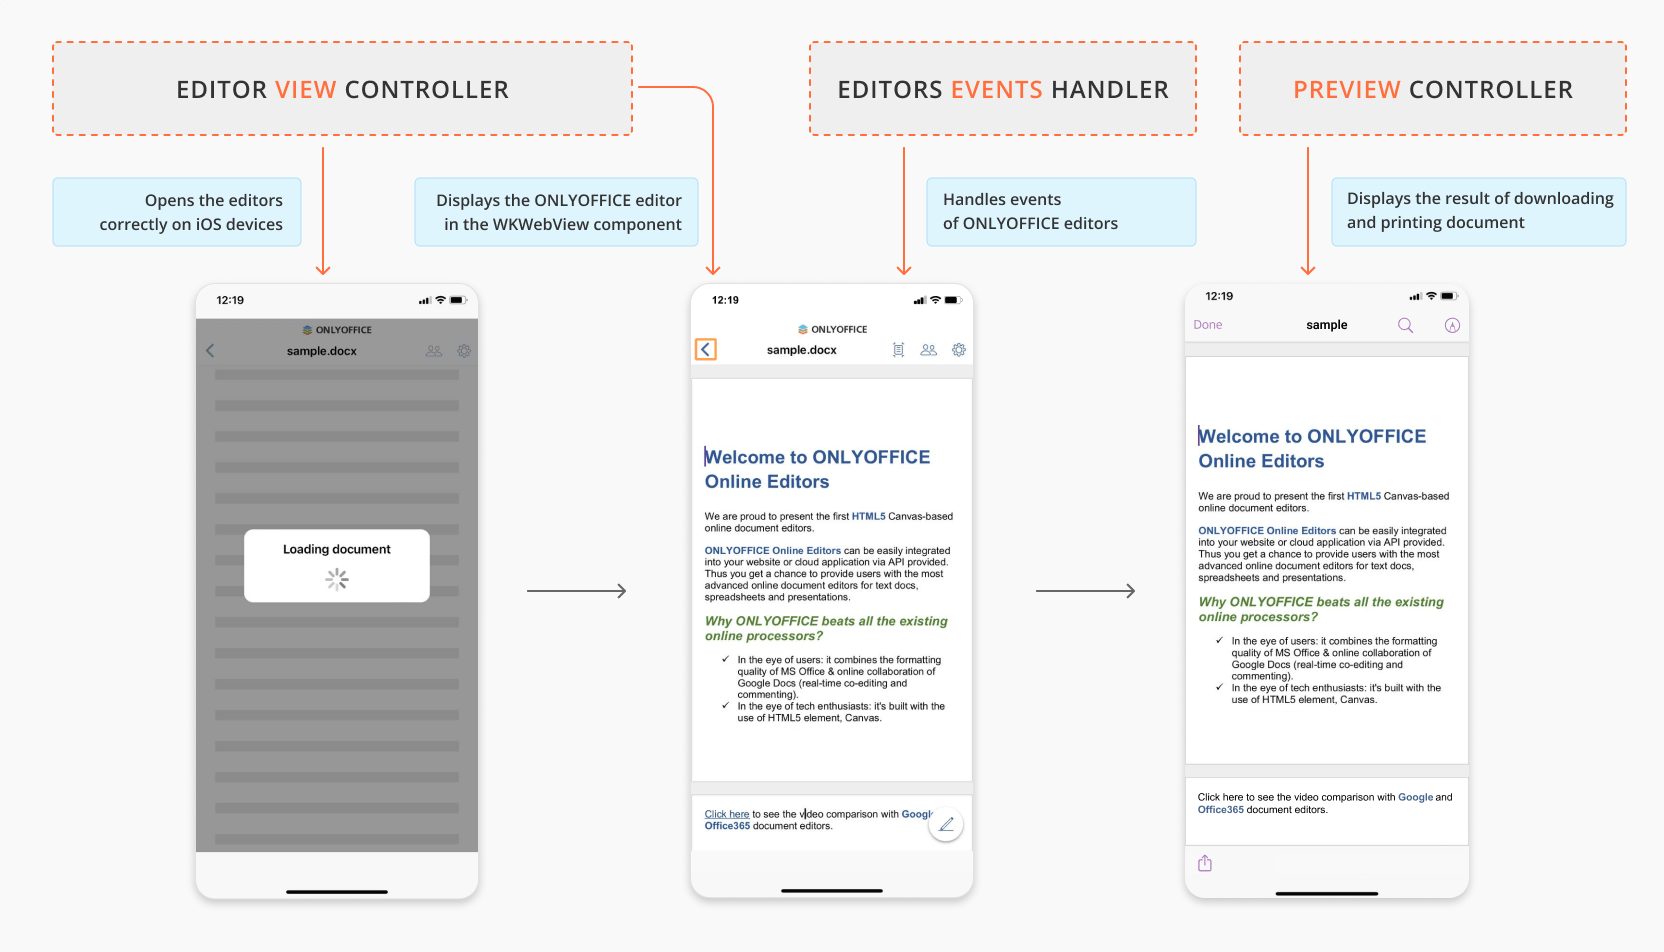
Use the
DocumentServerViewControllercontroller to open the editors correctly on iOS devices. In this controller, define a function to open a document via WKWebView component. First, request an absolute URL and check if it contains the"/editor?"string. If so, add an additional query parameter (the mobile platform type) to the link:private var openDocumentMarker = "/editor?"private var additionalQueryParameters = ["type": "mobile"]func webView(_ webView: WKWebView,decidePolicyFor navigationAction:WKNavigationAction,decisionHandler: @escaping (WKNavigationActionPolicy) -> Void){guard let urlString = navigationAction.request.url?.absoluteString else {decisionHandler(.cancel)return}if urlString.contains(openDocumentMarker),let redirectUrl = navigationAction.request.url?.appendingQueryParameters(additionalQueryParameters){decisionHandler(.cancel)navigator.navigate(to: .documentServerEditor(url: redirectUrl))} else {reloadItem.isEnabled = truebackItem.isEnabled = webView.canGoBackforwardItem.isEnabled = webView.canGoForwardtitle = navigationAction.request.url?.host ?? ""decisionHandler(.allow)}} -
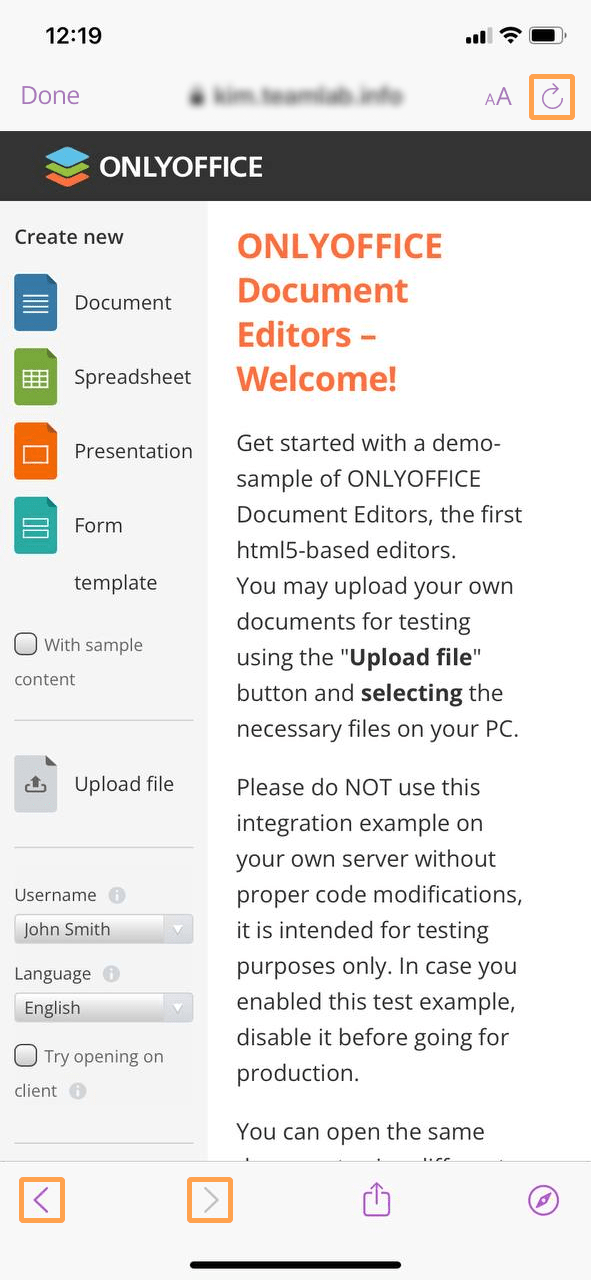
In the
DocumentServerViewControllercontroller, create the navigation actions available on the DMS main page. For example, in our test sample, they are specified with the interface elements such as the Reload, Back, and Forward buttons. -
For easy interaction with the editor, define the Activity Indicator and Progress View UI components.
The full code for
DocumentServerViewControllercan be found here.

-
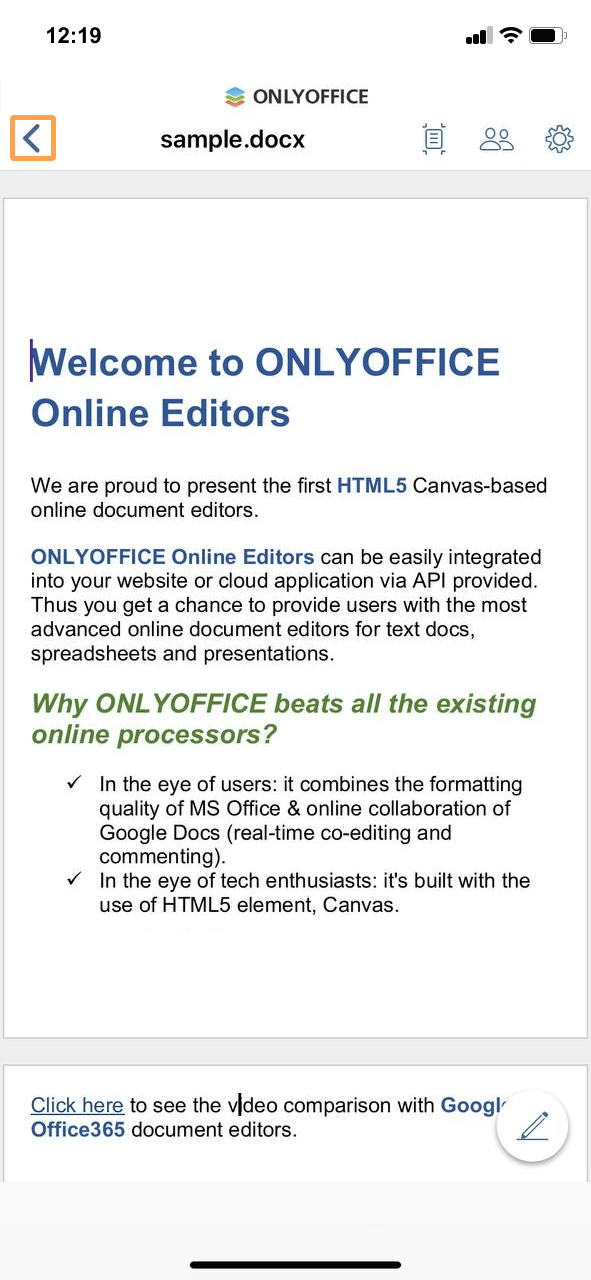
To start working with documents, display the ONLYOFFICE editor on your mobile device via the WKWebView component. To do this, set up WKWebView and layout in the
DocumentServerEditorViewControllercontroller as follows:private lazy var webViewConfiguration: WKWebViewConfiguration = {let preferences = WKPreferences()let dropSharedWorkersScript = WKUserScript(source: "delete window.SharedWorker;",injectionTime: WKUserScriptInjectionTime.atDocumentStart,forMainFrameOnly: false)preferences.javaScriptEnabled = true$0.userContentController.addUserScript(dropSharedWorkersScript)$0.preferences = preferencesreturn $0}(WKWebViewConfiguration())private func configureView() {webView = WKWebView(frame: .zero, configuration: webViewConfiguration)view.addSubview(webView)webView.translatesAutoresizingMaskIntoConstraints = falsewebView.navigationDelegate = selfwebView.uiDelegate = selfif let webViewSuperview = webView.superview {webView.topAnchor.constraint(equalTo: webViewSuperview.topAnchor).isActive = truewebView.leadingAnchor.constraint(equalTo: webViewSuperview.leadingAnchor).isActive = truewebView.bottomAnchor.constraint(equalTo: webViewSuperview.bottomAnchor).isActive = truewebView.trailingAnchor.constraint(equalTo: webViewSuperview.trailingAnchor).isActive = true}} -
In the Xcode toolbar, select a build scheme and a device where the app will be run. After that, choose Product -> Run, or click the Run button in the project toolbar to build and run your code.
-
On the main screen of the application, select the Using DocumentServer option to demonstrate an example of integrating ONLYOFFICE mobile web editors with the ONLYOFFICE test or DMS sample.
Closing ONLYOFFICE editors
Use the DocumentServerEditorViewController controller to exit from the editor. When the user navigates back to the DMS main page URL, the controller intercepts the navigation and pops back to the previous screen:
func webView(_ webView: WKWebView,
    decidePolicyFor navigationAction: WKNavigationAction,
    decisionHandler: @escaping (WKNavigationActionPolicy) -> Void)
{
    guard let urlString = navigationAction.request.url?.absoluteString else {
        decisionHandler(.cancel)
        return
    }

    if urlString == Env.documentServerExampleUrl {
        decisionHandler(.cancel)
        navigationController?.popViewController(animated: true)
    } else {
        decisionHandler(.allow)
    }
}
The full code for DocumentServerEditorViewController can be found here.
Integration based on the ONLYOFFICE Docs API
This example shows how to open the ONLYOFFICE editors via WKWebView using the editor configuration described in the API documentation and the configuration examples.
Opening ONLYOFFICE editors
-
Download and install ONLYOFFICE Docs Enterprise or Developer.
-
Download the mobile demo sample for iOS from GitHub.
-
Open the
EditorWebViewDemo.xcodeprojproject with Xcode to modify code fragments of this example for your DMS to work correctly. -
Create an empty
.htmlfile. The demo project editor.html resource is used as a template. -
Add the
<div>element as shown below:<div id="placeholder"></div> -
Specify your ONLYOFFICE Docs link with the JavaScript API that will be used for your website:
<script type="text/javascript" src="https://documentserver/web-apps/apps/api/documents/api.js"></script>Where
documentserveris the name of the server where ONLYOFFICE Docs is installed.tipDon't have a document server yet? Register for a free ONLYOFFICE Docs Cloud and use the public IP address or public DNS name of your instance as
documentserver. You can find them in the Instances section of the cloud console. -
Add the script initializing the Document Editor for the
<div>element with the configuration for the document you want to open. Define event handler functions that forward events to native code viawindow.webkit.messageHandlers, and pass them to the editor config:<script type="text/javascript">var handler = window.webkit.messageHandlers;var onAppReady = function() {handler.onAppReady.postMessage({});};var onDownloadAs = function(event) {handler.onDownloadAs.postMessage({fileType: event.data.fileType, url: event.data.url});};// ... other event handlers ...window.docEditor = new DocsAPI.DocEditor("placeholder",{{external_config},"type": "mobile","events": {"onAppReady": onAppReady,"onDocumentReady": onDocumentReady,"onDownloadAs": onDownloadAs,"onError": onError,"onInfo": onInfo,"onRequestClose": onRequestClose,"onRequestInsertImage": onRequestInsertImage,"onRequestUsers": onRequestUsers,"onWarning": onWarning,}});</script> -
To start working with documents, display the ONLYOFFICE editor on your mobile device via the WKWebView component. To do this, specify the
EditorViewControllercontroller. Request the URL to theeditor.htmlfile, get its contents, replace the placeholder values with the actual configuration fromsamples.plist(where all sample configurations are categorized according to the API documentation Try page), sign the config with a JWT token, and inject the document server URL:private func load() {guard let url = Bundle.main.url(forResource: "editor", withExtension: "html") else {return}var html = ""do {html = try String(contentsOf: url)} catch {print(error)}var config = config?.replacingOccurrences(of: "{KEY}", with: UUID().uuidString).replacingOccurrences(of: "{DOC_URL_PATH}", with: Env.documentServerFilesUrl).replacingOccurrences(of: "{CALLBACK_URL}", with: Env.editorCallbackUrl).toDictionary() ?? [:]config["token"] = JWT.encode(claims: config, algorithm: .hs256(Env.documentServerJwtSecret.data(using: .utf8)!))let jsonString = (config.jsonString(prettify: true) ?? "").dropLast().dropFirst()html = html.replacingOccurrences(of: "{document_server_url}", with: Env.documentServerUrl).replacingOccurrences(of: "{external_config}", with: jsonString)webView.loadHTMLString(html, baseURL: nil)}
The full code for
EditorViewControllercan be found here. -
In the Xcode toolbar, select a build scheme and a device where the app will be run. After that, choose Product -> Run, or click the Run button in the project toolbar to build and run your code.
-
On the main screen of the application, select the Using API Configuration option to demonstrate how to open the ONLYOFFICE mobile web editors using the editor configuration described in the API documentation and the configuration examples.
-
On the next page, choose one of the configuration samples to open the resulting HTML in the WKWebView component.
Working with documents
To work with documents (open, download, insert images, mention other users, etc.), use the API documentation with its events and methods:
-
To track events and call appropriate methods, handle the events of ONLYOFFICE editors in native code by the
EditorEventsHandlercontroller and then delegate them toEditorViewController:var delegate: EditorEventsDelegate?convenience init(configuration: WKWebViewConfiguration) {self.init()configuration.userContentController.add(self, name: EditorEvent.onDownloadAs.rawValue)}extension EditorEventsHandler: WKScriptMessageHandler {func userContentController(_ userContentController: WKUserContentController,didReceive message: WKScriptMessage){let event = EditorEvent(rawValue: message.name)switch event {case .onDownloadAs:guardlet json = message.body as? [String: Any],let fileType = json["fileType"] as? String,let url = json["url"] as? Stringelse { return }delegate?.onDownloadAs(fileType: fileType, url: url)}}}The onDownloadAs event is used here as an example. Register an object as a handler for a particular message by calling
configuration.userContentController.add(self, name: messageName)during the WKWebView configuration. Get the event parameters (file type and URL) and delegate the event handling toEditorViewController:func onDownloadAs(fileType: String, url: String) {print("⚡ ONLYOFFICE Document Editor create file: \(url)")} -
Define the
callMethodfunction to call API methods from native code. It can take string, boolean or object values as arguments. This function adds the method name and its arguments to the string with the JavaScript code and then evaluates JavaScript in the WKWebView component with theevaluateJavaScriptmethod:private func callMethod(function: String, arg: Bool) {let javascript = "window.docEditor.\(function)(\(arg))"webView.evaluateJavaScript(javascript, completionHandler: nil)}private func callMethod(function: String, arg: String) {let javascript = "window.docEditor.\(function)(\"\(arg)\")"webView.evaluateJavaScript(javascript, completionHandler: nil)}private func callMethod(function: String, arg: [String: Any]) {guardlet json = try? JSONSerialization.data(withJSONObject: arg, options: []),let jsonString = String(data: json, encoding: .utf8)else {return}let javascript = "window.docEditor.\(function)(\(jsonString))"webView.evaluateJavaScript(javascript, completionHandler: nil)}The full code for
EditorEventsHandlercan be found here. -
To display the result of downloading and printing a document, use the
PreviewControllercontroller. This controller is based onQLPreviewController. Download a document by its URL and set thedataSourceanddelegateproperties toQLPreviewController:func present(url: URL, in parent: UIViewController, complation: @escaping (() -> Void)) {download(url: url) { fileUrl inDispatchQueue.main.async {guard let fileUrl = fileUrl else {complation()return}self.fileUrl = fileUrllet quickLookController = QLPreviewController()quickLookController.dataSource = selfquickLookController.delegate = selfif QLPreviewController.canPreview(fileUrl as QLPreviewItem) {quickLookController.currentPreviewItemIndex = 0parent.present(quickLookController, animated: true, completion: nil)}complation()}}}The full code for
PreviewControllercan be found here.