How to integrate online editors into your own website on Java
Overview
This example will help you integrate ONLYOFFICE Docs into your web application written in Java.
Important security info
Please keep in mind the following security aspects when you are using test examples:
- There is no protection of the storage from unauthorized access since there is no need for authorization.
- There are no checks against parameter substitution in links, since the parameters are generated by the code according to the pre-arranged scripts.
- There are no data checks in requests of saving the file after editing, since each test example is intended for requests only from ONLYOFFICE Docs.
- There are no prohibitions on using test examples from other sites, since they are intended to interact with ONLYOFFICE Docs from another domain.
For Windows
Step 1. Install ONLYOFFICE Docs
Download and install ONLYOFFICE Docs (packaged as Document Server):
See the detailed guide to learn how to install ONLYOFFICE Docs for Windows.
Step 2. Download the Java code for the editors integration
Download the Java example from our site.
To connect the editors to your website, specify the path to the editors installation and the path to the storage folder in the src/main/resources/settings.properties file:
storage-folder = app_data
files.docservice.url.site=https://documentserver/
where the documentserver is the name of the server with the ONLYOFFICE Docs installed and the storage-folder is the path where files will be created and stored. You can set an absolute path. For example, D:\\folder. Please note that on Windows OS the double backslash must be used as a separator.
If you want to experiment with the editor configuration, modify the parameters in the src/main/webapp/editor.jsp file.
Step 3. Install the prerequisites
To run the Java example code, install the Java version appropriate for your OS and web server Apache Tomcat:
- Java (download from the Oracle official website);
- Apache Tomcat: version 9.0.x (download from the official website).
Step 4. Run Apache Tomcat
-
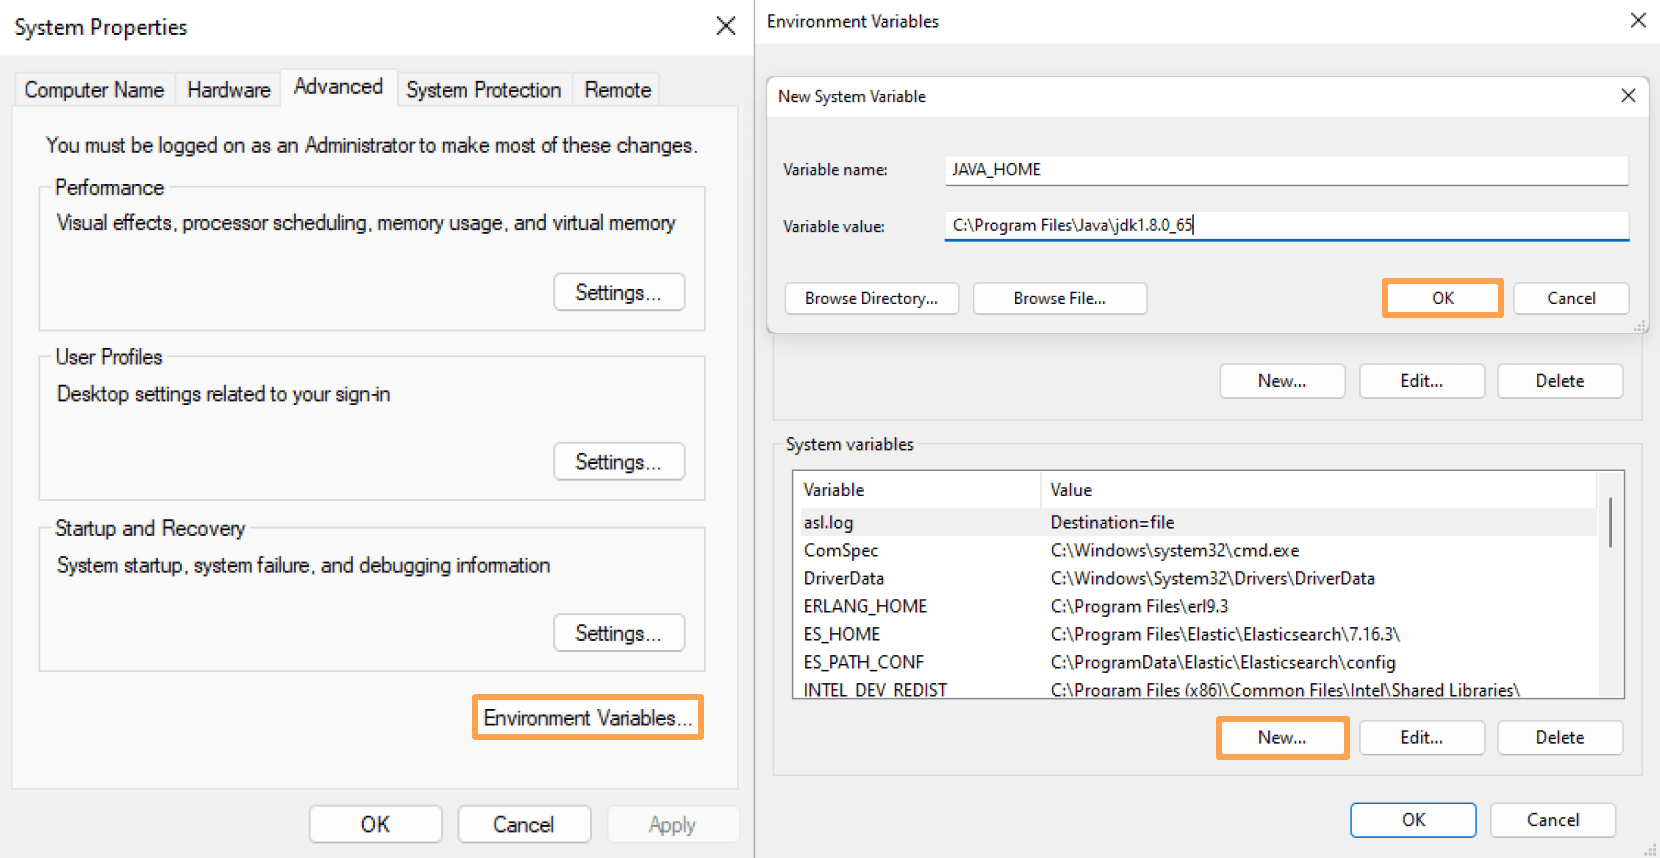
After you have installed Java on Windows, set the JAVA_HOME environment variable to point to the Java installation directory.
Find out where Java is installed. If you didn't change the path during installation, it will be something like this:
C:\Program Files\Java\jdk1.8.0_65
In Windows 7, right click My Computer and select Properties, then click Advanced.
In Windows 8, go to Control Panel and select System, then click Advanced System Settings.
Click the Environment Variables button.
Under System Variables, click New.
In the Variable Name field, enter JAVA_HOME if you installed the JDK (Java Development Kit) or JRE_HOME if you installed the JRE (Java Runtime Environment).
In the Variable Value field, enter your JDK or JRE installation path, for example C:\Program Files\Java\jdk1.8.0_65.
Check if the variable created successfully by echo command in the Command Prompt:
echo %JAVA_HOME%
-
Run the Command Prompt. Change the current directory for the Apache Tomcat installation directory:
cd /d C:\Apache Tomcat\apache-tomcat-7.0.67\bin
-
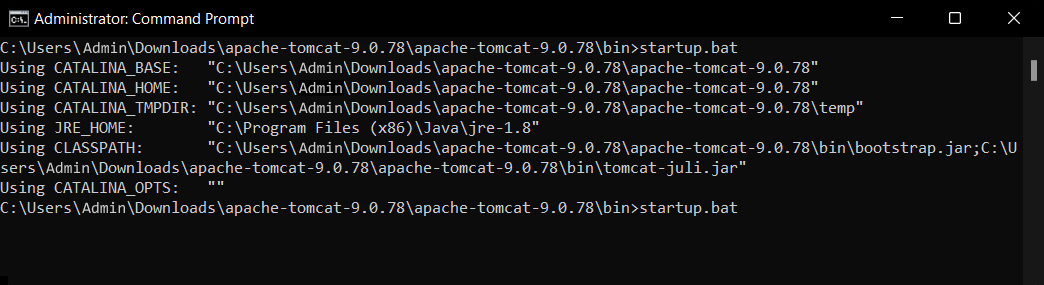
Use the bin startup.bat script to start Apache Tomcat:
startup.bat
You will see the new Tomcat console window displayed that provides the information and messages about Tomcat startup:
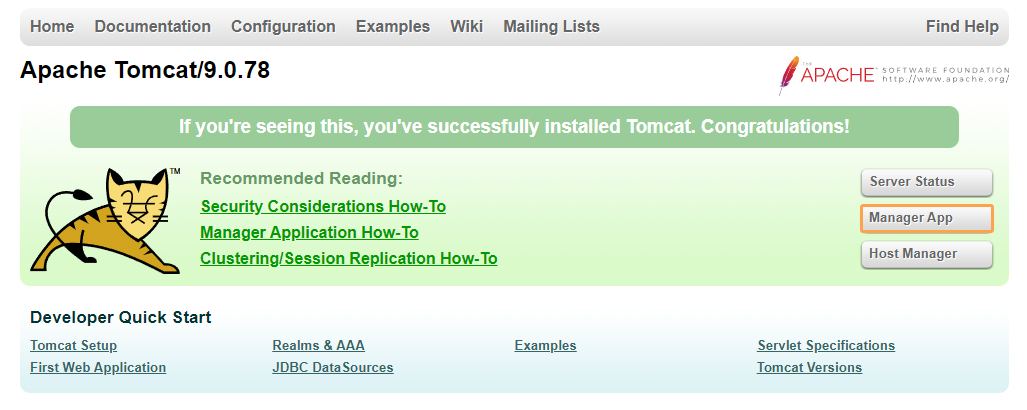
Test your Tomcat installation using the address in a web browser:
http://localhost:8080If everything is correct, you will see the Tomcat web page in the browser as shown below.
Step 5 . Run the Java code
-
Open Tomcat Web Application Manager by clicking Manager App:
-
Tomcat Web Application Manager will request the username and the password:
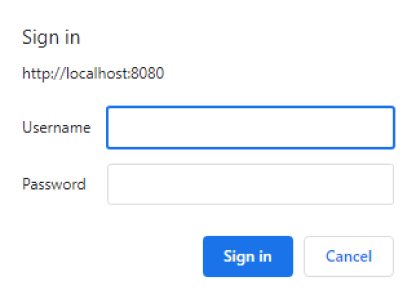
Specify user data in tomcat-users.xml file in the Apache Tomcat installation folder. Define the manager-gui user role, specify the user name and password values:
<tomcat-users> <role rolename="manager-gui"/> <user username="tomcat" password="tomcat" roles="manager-gui"/> </tomcat-users> -
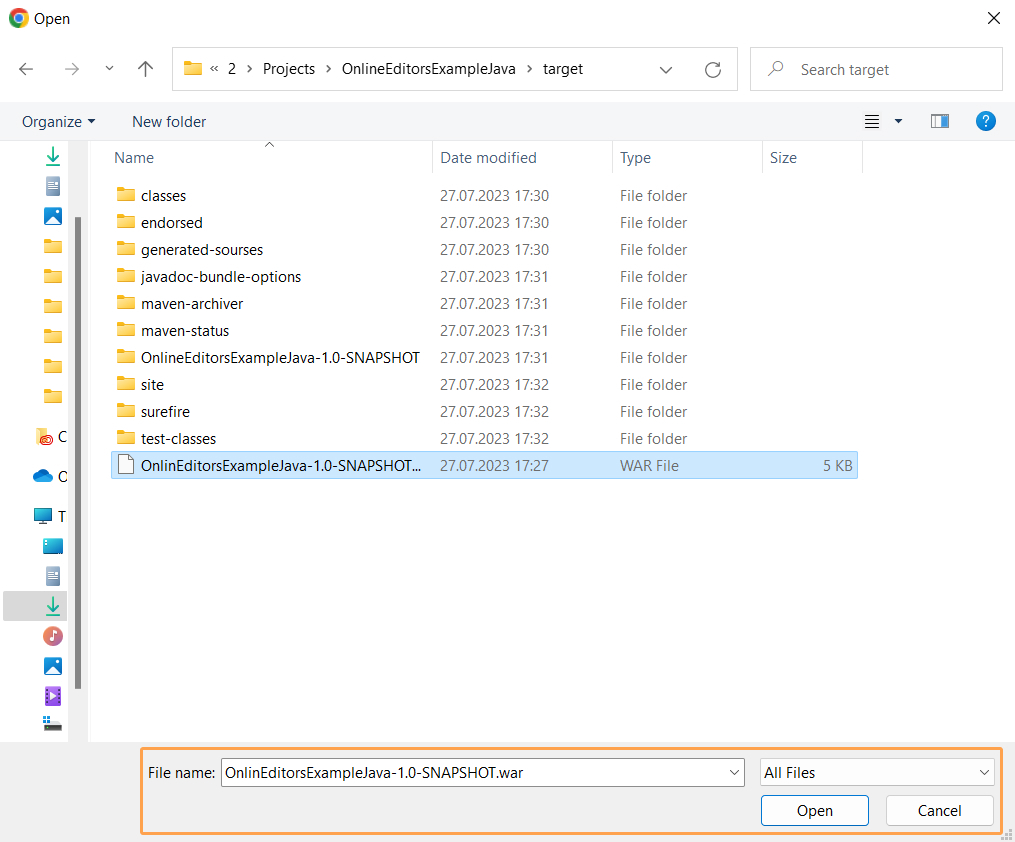
Upload the Java project in Tomcat Web Application Manager. For that click Choose File in the WAR file to deploy section and find the .war file in the Java project folder, then click Deploy.

-
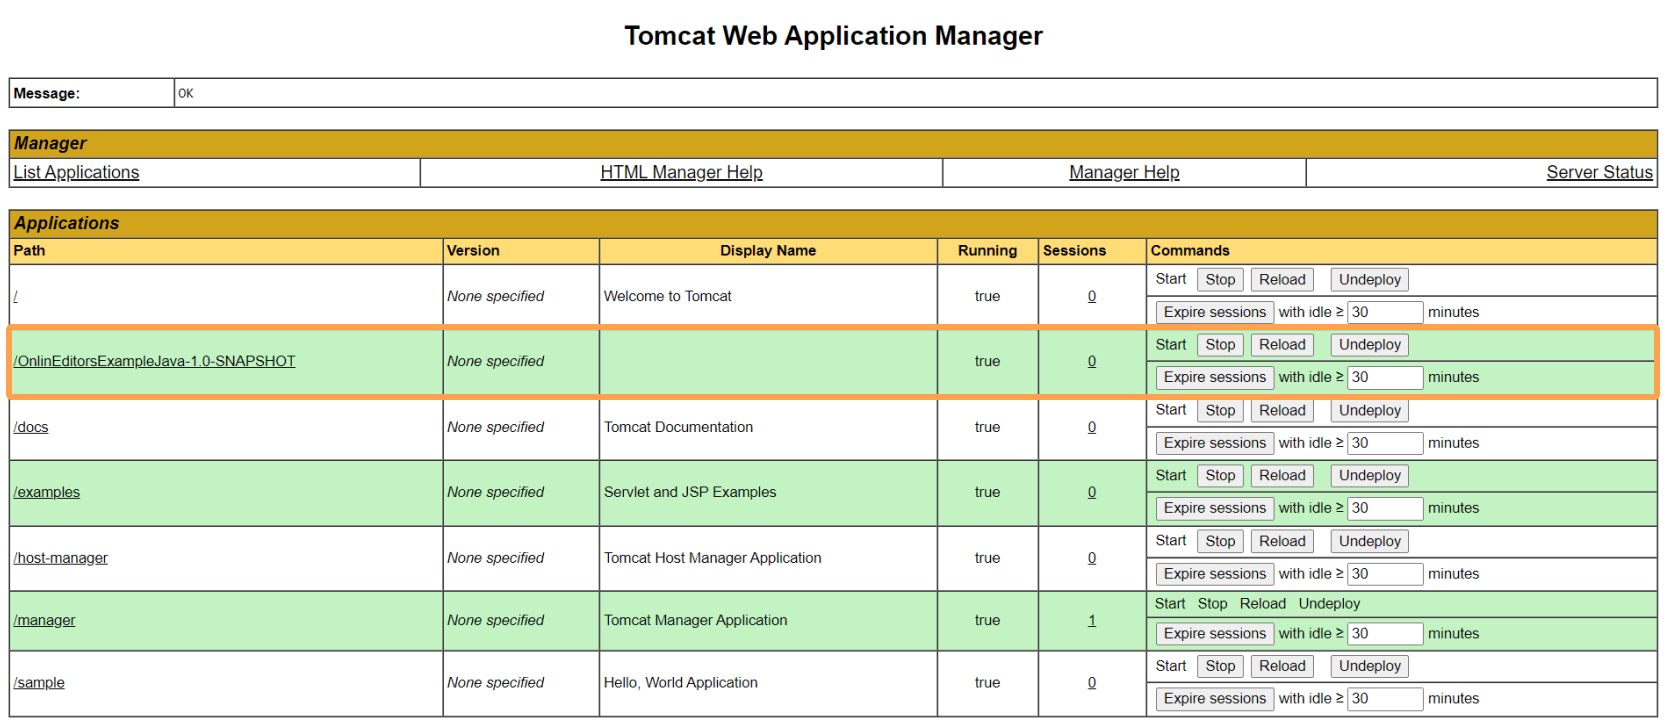
You will see the project in the Application List:
-
Click the link with the application name to run it.
Step 6. Check accessibility
In case the example and ONLYOFFICE Docs are installed on different computers, make sure that your server with the example installed has access to the ONLYOFFICE Docs with the address which you specify instead of documentserver in the configuration files. Make sure that the ONLYOFFICE Docs in its turn has access to the server with the example installed with the address which you specify instead of example.com in the configuration files.
If you integrated the editors successfully the result should look like the demo preview on our site.
For Linux
Step 1. Install ONLYOFFICE Docs
Download and install ONLYOFFICE Docs (packaged as Document Server):
See the detailed guide to learn how to install ONLYOFFICE Docs for Linux.
Step 2. Install the prerequisites and run the website with the editors
- Install Java following the instructions here.
- Download the archive with the Java example and unpack the archive: wget https://github.com/ONLYOFFICE/document-server-integration/releases/latest/download/Java.Example.zip unzip Java.Example.zip
- Change the current directory for the project directory:
cd Java\ Example/
- Edit the src/main/resources/settings.properties configuration file.
Specify the name of your local server with the ONLYOFFICE Docs installed.
nano src/main/resources/settings.properties
Edit the following lines:
storage-folder = app_data
files.docservice.url.site=https://documentserver/
where the documentserver is the name of the server with the ONLYOFFICE Docs installed and the storage-folder is the path where files will be created and stored. Please note that you must have read and write permissions to the folder. If you do not have them, please use the next command:
sudo chmod -R ugo+rw /{path} - Install Maven:
sudo apt-get install maven
- Build:
mvn package
- Install Tomcat with the administration page:
sudo apt-get install tomcat8 tomcat8-admin
- Configure the admin user on Tomcat:
sudo nano /var/lib/tomcat8/conf/tomcat-users.xmlInsert the lines:
<role rolename="manager-gui"/>
<user username="USERNAME" password="PASSWORD" roles="manager-gui"/>
where the USERNAME and PASSWORD are your own credentials data.
Restart Tomcat:systemctl restart tomcat8 - Open the Tomcat administration page in browser with the admin user credentions:
http://localhost:8080/manager/html
- Select the WAR file to upload from target/OnlineEditorsExampleJava-1.0.war.
- See the result in your browser using the address:
http://localhost:8080/OnlineEditorsExampleJava-1.0/
Step 3. Check accessibility
In case the example and ONLYOFFICE Docs are installed on different computers, make sure that your server with the example installed has access to the ONLYOFFICE Docs with the address which you specify instead of documentserver in the configuration files. Make sure that the ONLYOFFICE Docs in its turn has access to the server with the example installed with the address which you specify instead of example.com in the configuration files.
If you integrated the editors successfully the result should look like the demo preview on our site.
For Docker
Step 1. Install ONLYOFFICE Docs
Download and install ONLYOFFICE Docs (packaged as Document Server):
See the detailed guide to learn how to install ONLYOFFICE Docs for Docker.
Step 2. Install the prerequisites and run the website with the editors
- Install Java following the instructions here.
- Download the archive with the Java example and unpack the archive: wget https://github.com/ONLYOFFICE/document-server-integration/releases/latest/download/Java.Example.zip unzip Java.Example.zip
- Change the current directory for the project directory:
cd Java\ Example/
- Edit the src/main/resources/settings.properties configuration file.
Specify the name of your local server with ONLYOFFICE Docs installed:
nano src/main/resources/settings.properties
Edit the following lines:
storage-folder = app_data
files.docservice.url.site=https://documentserver/
where the documentserver is the name of the server with the ONLYOFFICE Docs installed and the storage-folder is the path where files will be created and stored.
- Run the next command in the Java example directory:
docker-compose up
- After it, all the bin files will be passed to the ./target folder.
Step 3. Check accessibility
In case the example and ONLYOFFICE Docs are installed on different computers, make sure that your server with the example installed has access to the ONLYOFFICE Docs with the address which you specify instead of documentserver in the configuration files. Make sure that the ONLYOFFICE Docs in its turn has access to the server with the example installed with the address which you specify instead of example.com in the configuration files.
If you integrated the editors successfully the result should look like the demo preview on our site.